 Alaina's finished quilt in blues and purples. I love the back. Aren't those the cutest owls ever!
 Rachels' finished quilt in pinks and puurples. I love the floral and stripe on hers.
 Alaina's finished quilt in blues and purples. I love the back. Aren't those the cutest owls ever!Rachels' finished quilt in pinks and puurples. I love the floral and stripe on hers.
 My grandmother has a saying. "When you find yourself getting stressed or worried... Be a Duck. Let the water roll off your back and just keep swimming along." (not her exact quote, but it's the meaning) Today I found myself trying hard to be the duck.
 Bonus pic of beautiful Grammy cracking up on her 96th b-day.

 The Solid Border: I cut 4" strips of fabric and sewed them together into one very very long strip. Then I just added it to the quilt. I used a mottled solid to balance out all the happy colors of the quilts. Purple for Ray's quilt and blue for Ali's quilt.
 The Backing: I'll post better pics of the backing as soon as I can. The photos below are just small sections of the backings. I used 3 different fabrics for each of the backs. I wanted to backs to be just as pretty as the front. So... a very large patchwork... Below is my sketch of the backing so you can get an idea of what it looks like.
 Putting It Together: So after the fronts and backs were done it was time to assemble the quilts. Now, I had originally intended to lay everything out, pin it all up, quilt it, and then bind the edges. But, time was an issue and I decided to go the "quick" route. I pinned the fronts and backs right sides together and then the batting on top of that. I sewed along the edge and left a large section open. Then I turned it all around. I then had sewed up the opening and began to quilt.


 Today I did some Christmas baking and discovered a new recipe. When making fudge I always use Kraft Jet-Puffed Marshmallow Creme and I follow the directions on the back for their fudge. But, tonight I didn't have any evaporated milk and I wanted to try using dark chocolate chips. Below is my improvised recipe. It turned out sooooo yummy.
 Marisol the mouse caused quite a ruckus in the house the other day. I found the pattern here. I love love love FuzzyMittens patterns and this one is no exception. I knit this little cutie up as soon as I found the pattern. Both my daughters fell in love with it and asked for some of their own. Even my hubby thinks she is way to cute. Much cuter than the photo shows. I have a feeling that pretty soon little Marisol will have a huge mousie family.
 Yesterday was another good day of sewing. Although I did very much notice that my calculations were off for the border pieces. They are suposed to be 8" squares not 7" squares. I've made that change on the cutting list on Part 1 of the I-Spy Project. Needless to say... I had cut all my border squares at 7" already. Hmmm... I wasn't about to re-cut all the squares so I decided to make my center square on the sides longer and then add a a small piece on the top and bottom corners to make up the difference. Nothing lines up right with the squares from the center I-Spy part and the border like I had planned. But, I'm still very very pleased with how it's turning out. It has a very homey, colorful, happiness about it. Next will be the outside border on this quilt and the then I have to put both borders on the other quilt. The one pictured is for my youngest, Rachel. She loves pinks and purples so her border colors go with that. And, her backing is also in purples. Alaina's quilt will have blue and purples as the borders and backing.
 Here is my basic computer sketch of what the quilts will look like when they are done. (the colors are frightening... but you can get the general idea) Each square is a 3.5" finished size. The quilt has 10 rows of 15 squares for the center I-Spy part. The border around that will have blue and purple simple print fabrics for one quilt and the other will have purple and pink simple print fabrics. Then around that will be a plain border to finish it all off. The gray center border rectangles are undecided at the moment. I'm thinking of using either a solid fabric and then applique' on my girls initials... Or maybe using the backing fabric there... not sure yet. The backing will be flannels and I'm planning on quilting in the ditch.
 Yesterday I got started with the sewing of the quilt. I was able to finish both of the quilts center I-Spy sections. Above is one of the centers... I think this one is for my youngest. Most of the squares are the same for each of the girls quilts. But, I tried to find a few that were different and specific to each girl. My mom helped with all the pressing and pinning yesterday... that was a huge help. Today we'll be doing the large block border and hopefully the small solid border too.
 I'm working on a commission for a satiny little girls Christmas dress. I wanted to test out my pattern before cutting into the satin. This dress looks nothing like the commissioned dress. It started out like it, then it evolved into something else. I still need to hem it. And, I'm thinking of adding some black tulle underneath maybe. Or, maybe just some black capri leggings. I think that next time I'll change the neckline a bit... maybe even try using jersey for the top part of the dress.
 There was a new dollie arrival in the house today. She is a MSD Souldoll Tiffee. As Soon as I saw her little face in the box I knew that her name was Kaylee. It's hard to see Kaylee with the blond wig on and the "normal" clothing. I'll need to get her a shortish brown wig and make her some Asian print shirts and an awesome pair of coveralls. Maybe even some big ol' combat boots. But, even without all those things, she is a very pretty doll.
 I love her body shape and her face. She is fuller than my Narae so she will be a fantastic model for me to have around. Her hands are pretty and her little face is just to cute. The pale face-up gives her a childlike innocence. I'm thinking that in the future it will need to be redone in less pinks and more natural tones. This doll makes me itch to create something new. I'm going to be thinking about those coveralls all night long. I might have to save some time this weekend or next week to draft up a pattern and get started.
 For those of you who don't know who Kaylee is..... She is a character on the show Firefly and the movie Serenity. If you haven't seen either, I highly recommend you do. Most of my dolls have names after characters from the show.
 The Witch and The Princess:
 Some Weasleys:
 And, of course the pumpkins... left out of the title, but just as important.
 Salsa has quickly become tradition in our home. No Mexican meal would be complete without it. But, it can't be just any ol' salsa. It has to be home made salsa. This stuff is sooo tasty that our oldest who won't eat any veggies will eat this stuff by the spoonful. And, as an added bonus, the kids love to help make it.
  Step One – Pull off leaves of Cilantro. I had approx 2 cups. Don't worry about the stems to much. Throw it in the food processor and pulse it until it's fairly well chopped. Then scrape it out and into a bowl. It should look something like this:
 Step Two – Chop off ends of onion and the outside skin. Chop into quarters and put in food processor. Chop until desired consistency. We like it a bit chunky. But, you could certainly keep chopping until smoother if you prefer that. Add to bowl.
 Step Three – Chop tomatoes in half and remove insides. We do this so the salsa won't be to watery. But, if you prefer more liquid then by all means just chop the tomatoes in half and toss into food processor.
 I do my tomatoes in two or three batches so they don't get to mushy. In one of the batches I add the jalapeno and garlic so they get good and mixed in. Put tomatoes in bowl.
 Step Four – Mix it all up and add the lime juice and salt to taste. You may want to add more cilantro or tomatoes... Don't be afraid to add stuff if you want!
 Step Five – I usually stick it in the refrigerator until dinner so the flavors can all meld together. But, you can eat it now if you want. I can't tell you how many times the salsa never makes it to the refrigerator before it's gone.
 A friend of mine is having a baby next month. I'm off to her baby shower today. For her gift I made her a little baby vest, socks, and a reusable shopping bag to wrap it all up in. I just loved knitting this set up. The baby socks were done in less than 3 hours and the vest was done in about 6. Next time they will both go faster as this was the first time I've used either of these patterns.
 For the yarn I used Plymouth Encore Worsted. It's 75% acrylic and 25% wool and is machine washable and dryable. I loved this yarn. It's so soft and perfect for baby wear. Both projects on my Ralvery project page if you want to check them out.
 This vest buttons down the side and on one shoulder. I was able to dig into my button jars for this project. I decided on pink, white, and pale purple buttons to make the top more "girly". I just love love the pink girls holding hands button. It reminds me of my friend and I as little girls. I've known her forever.
 Pattern for "Simply Sweet Baby Socks" is here on Ralvery
 Ok... so I got distracted. After that last post I noticed that I rarely write about my BJD dolls that I sew for. They are a large part of my hobby/art life and I'm surprised at myself. These dolls are used as models for my clothing, inspiration, and just general enjoyment. I've always loved dolls. But it wasn't until my mid 20's that I truly got back into the doll hobby. All clothing and a few of the wigs were made by me.
 Inara - Inara is my favorite . She is a Narae from the Narindoll company. 43cm tall and sooooo pretty. She is a dream to dress and sew for. She can wear pretty much any wig and her sculpt is perfection.
  Lucas - Lucas is a Latidoll Blue Rucus. He is taller than most MSD males and has mature body sculpt. Boy do I need to get some better pictures of the two of them. He has facial hair now and I couldn't find a single current photo of him.
 Persephone - She is my smallest bjd. She's a Dollzone BB Ani and is about 27cm tall. I've had 4 other tiny bjd's all smaller than her. But the were just to small. I call her a "petite" bjd because she's to big to be a tiny and to small to be a msd. I love her little face with her freckles. And, I love making little girl clothes for her.
 Saphron - She is the newest to my collection. She is also a Narae from the Narindoll company. But, she is 58cm tall. She came to me second (maybe even third) hand. But, I love her. Narindoll makes such pretty dolls.
 Simon - He is an Bobobie Apollo. I have to admit that I only really have him to serve as a male model for me. To spice him up, my very talented mother painted him some facial hair, chest hair and um.... other hair. He's been a great model, but someday he will be switched out for another SD male.
 Vena - Ah... Vena..... She was my first ever BJD and has undergone more transformations than any other doll that I own. She started out as a Obitsu. Then I traded her for a Dolfie dream who's body she still has today. Eventually I got a Luts Nanuri head and painted her up to the doll that she is today. I don't think I'll ever sell this doll. To many memories. She really started my sewing business.
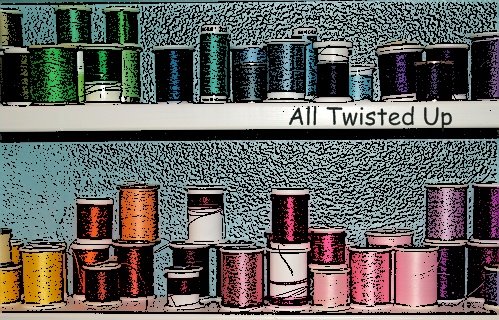
 I found myself starring at my doll cabinet today. Due to the "staging" of our home, it no longer contains all my dolls. Now, it's used for neatly folded fabrics and a few "inexpensive" dolls. My favorite BJD's have been exiled to a drawer in my desk. Not glamorous, but it's UV protected and away from prospective buyers nosing around the house.
 As I was standing there starring at the contents of the cabinet I found myself feeling very uninspired. The house is sterile and almost museum like. I'm afraid to get anything out and actually start a project even though all I want to do is create something. I knew I needed to find the fabric that I needed for my commission and get started, but I just kept starring at my first BJD, Vena. My mom dressed her all up for show and she was sitting there starring at me with her dolly eyes. I looked at the bomber jacket that I had made...and her jeans.... and her tank top and suddenly found the inspiration that I so needed. I grabbed the fabric I was looking for and I got to work . It's been weeks and weeks since I've used my sewing machine for making doll clothes. It feels so good to be sewing again and I'm so grate full for the commission that I'm working on. I drafted and cut out three patterns today and after this post I'm going to sit down and start sewing.


