These are sooo inspiring. More of my packages from the other week were these Jelly Rolls. The two on the left I'll be taking my folks when I go next week. I'm going to make a simple Jelly Roll quilt top while I'm there. (I'm hoping anyways....) I'm not sure yet what to do with the other. I was suposed to receive a charm pack of that line and instead I got the jelly roll. I asked her if she wanted me to ship it back and she told me that if I could use it, then we could call it even. Wow!!! I'll have to pay that forward somehow.
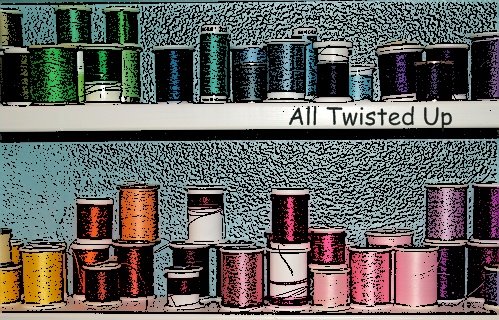
On the left is Simply Color by V & Co. for Moda. The top is the ombre co-ordinates to the prints in the bottom one.
The one on the right is Cuzco by Kate Spain for Moda. It's a yummy collection.
Showing posts with label Quilting. Show all posts
Thursday, October 4, 2012
Friday, July 20, 2012
Sewing Week With My Mom
My mom and dad came up for a whole week of sewing last month. It was the first time since they moved that mom and I have been able to really work on things together. It was so great. We chatted, played with the kids, and sewed, sewed, sewed. It really was awesome now much we got done.
My mom asked the girls to each design something to sew up. Ali used some graph paper to design a quilt top. About 20 minutes later she came in with a "Tetris" quilt top. Mom and her chose colors from both our stashes and they got that thing sewed up that afternoon. Mom quilted it and I added the words "Tetris" in different colors around the border. The backing was some sock monkey flannel that I've had. It turned out really cute. (tetris quilt is on the right)
Mom made up a sea life & bugs jar quilt. She had some super cute fabrics stashed away for this one. Black background, and red and yellow sashing made this top sooo cute. She got this thing cut, back pieced, quilted, and bound in the week she was here.
Rachel designed a pillow top. She picked out her favorite prints from our scrap boxes and mom sewed it up for her. Mom quilted it and I put the pillow backing together to finish it up. She loves it and has taken it to all her slumber parties so far this summer.
Mom also started her all reds quilt. These were big blocks in all reds. She's making it a queen size I think for their guest room. I think she had 10 or so blocks done before she left. What did I make? Well... I mostly finished this up. I added the purple border to my Terrain quilt. And, added the sashing to Cael's Robot Factory quilt. Then I pieced up 2 of the 3 vintage sheets lap throw tops. Finally I started working on Ali's quilt. It's from Sunday Morning Quilts. I need to piece together 200+blocks for this one. I'll make a seperate post on that one later.
Above is a pile of most of our finished goodness. From bottom to top: Tetris Quilt finished, Jar Quilt finished, Robot Factory top, 2 Vintage Sheet tops, Terrain top, and Ray's pillow.
Mom and I at the end of our week. Tired, but very happy to have had such a great week. I'm hoping to do this more often. Now that Cael is bigger I'm hoping to drive down to her on a weekend some time.
Oh... and you may ask what Curtis and my dad were doing this whole week. Well... Curtis had the week off so he and dad went shopping to some stores that Dad doesn't have down by him. The worked on the cars, and read books, etc. General guy stuff.
Tuesday, July 3, 2012
Vintage Sheets For The Win
I purchased a big ol' bundle of not so perfect vintage sheet fat quarters from this shop on etsy. There were 27 in all. There was only one that didn't match all the rest so I used 26 funky fat quaters to make 3 quilt tops for X-Mas gifts for this next year. I divided them up into sets. Stripes, Polka Dots, and Flowers. A picture of the floral quilt will be posted soon. It's done, but I haven't taken a pic yet.
These are smallish quilt tops right now. I would say small lap size. I'm thinking of bordering them though. For backs I'll be using a vintage sheet that I'm hoping to find at our local thrift store. I've found one blue and white floral for the back of the floral one.
I think I'm going to do just simple quilting on these babies. Free motion stipple for the border (if I do one) and then maybe using my wave stitch stretched on my machine for line quilting the rest.
If your looking for a way to make some quilts as gifts this is definitely a way to go. For $21.50 I have 3 quilt tops! And, the vintage goodness and patterns are perfect for the people who will be receiving them.
Sunday, July 1, 2012
For The Love Of Terrain.....
Terrain, Terrain, Oh how I love thee.....
I saw you and I knew I had to have you. Two charm sets and a few 1/3 yrds of my favorites later... and I have an absolutely gorgeous quilt top. I did a simple disappearing 9 patch and used Kona Purple and Kona Thistle for the center blocks. Purple Tile for the border. I'm not sure how I want to quilt this one up. I have a yummy bright blue and apple green print for the back. How would you quilt this one?
Friday, June 29, 2012
Robot Factory Quilt For Cael
Cael needs another quilt for his bed. I saw this fabric and loved it! I love how boyish it is. Even my hubby loves it! I found this pattern and knew it was the right one. I really love how it features 3 of the fabrics, yet the rest are cut to big enough blocks to be nice and viewable. I made a flannel backing for it and now I'm just deciding how I want to quilt it up.
Fabrics are Robot Factory by Robert Kaufman. I was able to get all the prints!
Tuesday, June 19, 2012
Kona Color Card In The House!
I finally broke down and bought the Kona Color Card. And, immediately after the postman delivered it, I started matching up solids to the Flea Market Fancy Legacy fabrics for my king size quilt I'm planning. I must have spent 3 days trying to find color matches online with very little success. I did find these. But, they were with the original prints and not all the colors were matched up. Plus, Kona has more colors now! I took photos and edited them and got them on my Flickr. It's been raining and my pictures were quite bad. My hubby came home and laughed at me. He pulled out the scanner and said "Why didn't you just use this?" He helped me scan all the color matches. Such a great hubby.... he must love me or something. The colors are showing really true in most of the images. Gotta love that! If you want to see all the color matches they are here. I'll be adding more collections when I'm working on stuff.
Here are a few of my favorites. I ordered these and more and I can't wait to get them!
Papaya... oh how I love thee...
Here are a few of my favorites. I ordered these and more and I can't wait to get them!
I really love sage here.
I love both the chartreuse and the lime. I ordered both!Papaya... oh how I love thee...
Friday, June 15, 2012
Finished Lizzy House Quilt!
I got around to quilting my Lizzy House quilt last week. Boy, did I have a time of it! I decided to try some big swirly circles....yeah... my machine has a medium size arm and it was still tough. By the time I was on my last row of swirly circles I was just getting it down. My circles were about half the size as they were when I started, but at least the looked ok. After a washing it puffed up beautifully and hopefully no-one will notice my less than par quilting job. Overall I love love love this quilt. It's so colorful and happy.
Thursday, June 14, 2012
Swoon... A Pillow For My Mom
I haven't blogged in forever! I've got so much to catch up on. I thought I would start first with this pillow that I made for my mom for her birthday back in April. Isn't it gorgeous! I finally broke down and purchased the Swoon pattern. This is a smaller version of the quilt block from this tutorial. It made a great 18" pillow cover. I used some lovely reds and whites. My mom's colors. I quilted it by going around those star points. You can kind of see it in on of the photos. She was very pleased with it and so am I. I can't wait to make a whole quilt with Swoon!
Friday, March 30, 2012
Lizzy House Quilt Top & Pillow
I absolutely adore Lizzy House Fabrics. My favorites by far are the 1001 Peeps and the Castle Peeps. I hunted and hunted for a good scrappy lot of these prints until I finally found a set of 50 13X8" prints on Etsy! The set also included some of her wonderful Outfoxed prints. When they arrived I just sat and looked at them and organized them and looked at them some more. I was a bit timid about starting a quilt. I wanted to use up every last scrap of this yummy stuff. And, I did!!!
I found a pattern in a magazine and used it as a base for my big blocks (some changes were required) then I made up my own borders. It's about 60" x 50" It'll be a nice comfy size when I'm done. I used some flannel that I have on hand for the backing. Now I just need to layer and quilt it up!
Just look at those yummy fabrics.... drool...... Above is the blocks about to be assembled. Below is the finished quilt top. Notice those HST's in the corners of the border.... I've come to learn that I need a LOT more practice matching up points.
With the tiny scraps I had left I made a pillow. In both the quilt and pillow I used some of the selvages in the seams. I'm really happy with them both. And, the pillow has already seen cuddle time.
Wednesday, March 14, 2012
Finished Solstice Star Series Quilt
I finished the top to my Solstice Star Series Quilt Along today. I posted about 4 of the squares here. I used a different pattern for the 5th block. The 5th block from the series I'll make for the back. I'm loving the top. Very crazy colorful and busy... but you can't help but smile when you look at it. I found the polka dot rainbow batik at the Puyallup Fabric Show a few weeks ago. It was a remnant at 52 x 44. I needed it to be 60 x 44 so I added the rainbow up top. For the backing I'm using a nice batik and am going to try and keep it very simple. I'm planning on just straight line quilting it.
Wednesday, February 8, 2012
Solstice Star Series - Block Along
Monday night I happened upon this blog post over on Fresh Lemons Quilt Blog. What a pretty blog! And, those star blocks are to die for! Tuesday morning I started on the three blocks that were from previous weeks and was able to get them all finished. This morning I refreshed the page and found that week 4's block was posted. During Cael's nap I was able to finish that one.
Week One Block
Week Two Block
I'm using all batiks with white as my background color. I wanted to do a rainbow of colors on each star. But, I was really surprised to find a total lack of yellows and oranges in my stash. (the fabric show next month will be the prefect place to fix this problem!) So, for those colors I'm fussy cutting some of my multicolored batiks. So far I'm really happy with these. I'm thinking it'll be a small quilt. Goodness knows I don't want anything to difficult to quilt on my machine. I am planning on adding some stars from her Summer Sampler as well.Week Three Block
Week Four Block
Sunday, January 29, 2012
1930's Dresden Quilt
I saw this blog post at the beginning of the month and I immediately knew I'd found the perfect pattern for my 1930's reproduction print fabrics. I've had these fabrics for a good 3 years now just waiting for inspiration to strike. I purchased the Dresden ruler and began the work of cutting it all out. I have to say that I was really excited to be working on this quilt. I swear, it just put itself together. I spent all my free time during Cael's naps and evenings after the kids went to bed for over a week.
I'm making the quilt bigger than the one in the Scrappy Plate Club. I'm making it a queen by using 20 blocks and adding more borders to the outside. Picture above shows over 600 4" plates cut out. I did end up cutting out another 100 or so for the border.
Finished plate above. I removed the dark red floral one. It really stood out and looked funny to me.
Here's two nice views of the quilt top minus the final two borders. It was so big that I couldn't get it all in the photo. I used each of the fabrics for the little blocks between the sashing.
Finished quilt top on my king size bed. I can't believe how big the queen actually is. In the top picture I have it placed on the bed the right way. I really love the red inner border. In the bottom picture it's pictured with the long sides going over the sides of my bed. (wrong way that it would go on a queen)
Here are some bonus pics of the bottom corners and scrappy border. I'm trying to use up as much of my fabrics as I can. So, I used the Dresden ruler to cut out more blades and I sewed them up to make a scrappy border. I really love how it looks. The blue dot on the outside border is the same fabric that will be used on the backing.
I've had a lot of fun with this quilt. Now, I'm working on the backing. I cut out 8" Dresden plates with the remainder of my fabrics. I'm going to make an L shape with them on the backing. I may have to add another fabric to the backing too as I'm not sure I have enough of the blue dot fabric. Pics of the backing will come in the next blog post about the quilt.
I'm making the quilt bigger than the one in the Scrappy Plate Club. I'm making it a queen by using 20 blocks and adding more borders to the outside. Picture above shows over 600 4" plates cut out. I did end up cutting out another 100 or so for the border.
Finished plate above. I removed the dark red floral one. It really stood out and looked funny to me.
Finished Dresden block. I purchased some Kona cotton in a vintage blue color for the centers and borders. And, the background fabric is a great white with red dot. I used the blanket stitch on my machine to applique the plate down using red, green, and yellow embroidery thread.
Here's two nice views of the quilt top minus the final two borders. It was so big that I couldn't get it all in the photo. I used each of the fabrics for the little blocks between the sashing.
Finished quilt top on my king size bed. I can't believe how big the queen actually is. In the top picture I have it placed on the bed the right way. I really love the red inner border. In the bottom picture it's pictured with the long sides going over the sides of my bed. (wrong way that it would go on a queen)
Here are some bonus pics of the bottom corners and scrappy border. I'm trying to use up as much of my fabrics as I can. So, I used the Dresden ruler to cut out more blades and I sewed them up to make a scrappy border. I really love how it looks. The blue dot on the outside border is the same fabric that will be used on the backing.
I've had a lot of fun with this quilt. Now, I'm working on the backing. I cut out 8" Dresden plates with the remainder of my fabrics. I'm going to make an L shape with them on the backing. I may have to add another fabric to the backing too as I'm not sure I have enough of the blue dot fabric. Pics of the backing will come in the next blog post about the quilt.
Friday, August 6, 2010
A Quilt For Cael Part 5 - Finished!
I finished Cael's quilt a few days ago. For the binding, I kinda cheated. I bought some double fold bias tape and just sewed it down. The corners aren't perfect, but I'm really happy with it anyways. I washed it up and it has that lovely puckering fluffyness that I love so much about handmade quilts. It looks great in his room and I'm sure it'll keep him toasty warm this winter.
Friday, June 25, 2010
A Quilt For Cael - Part 4

Yesterday I did a ton of work on Cael's quilt. I sandwiched all the layers and finished quilting it! I knew that I wanted to do free motion stippling, but I was nervous to do it. My machine is a bit.... temper mental and I wasn't sure it would do it for me. The last time I tried stippling it turned out a complete mess and I had to revert to standard straight line quilting. Anyways.... I played with the tension, stitch length settings, etc. and I finally got my sample piece to look somewhat decent.
The quilting took me about 3.5 hours for this quilt. Trying to get the big quilt to move around was a pain and my wrists were killing me when I finally finished. But, all in all I'm really happy with the results. I just that "puckery" look that a stippled quilt has. I'm anxious to get my binding tomorrow and finish up the quilt so I can throw it in the wash and put it in babies room.
*On a cute side note: When my hubby saw the quilt as I was quilting he looked at me and smiled and he said "I remember those fabrics." I love that our son will be wrapped in his dad's old work shirts.... I think I've said that before.
A Quilt For Cael - Part 3
I sewed up the quilt top late in to the evening on the 23rd. Even though I thought my rows were looking a bit long for a baby crib quilt, I kept on stitching. When I finished I finally noticed that it was to long. Way to long and not wide enough. I went back to my drawing and realized that instead of 11 rows of 8 I had drawn 8 rows of 11. Yeah... this is why I shouldn't do a complex math quilting project while pregnant!! Instead of undoing everything, I just cut off the bottom that I didn't need and added 3 more rows. It ended up working great and my final quilt top measures 39" x 58". A bit larger than a standard crib quilt, but not by much. I love the colors and the pattern that I chose. The photo doesn't show the whole top as I had a hard time getting a good photo of it at 11:00 at night.
Wednesday, June 23, 2010
A Quilt For Cael - Part 2
Subscribe to:
Posts (Atom)


